Backing Up Your Unity Project with Sourcetree and GitHub
With an account on GitHub, you can use Sourcetree to create local and remote repositories for any Unity project

I am a Unity C# developer, educator, and writer from Canada.
In this guide, you'll learn how to create a local and remote repository for your Unity project using Sourcetree and GitHub.
Prerequisites
- Make sure that your GitHub account is already linked with Sourcetree.
Creating a local repository
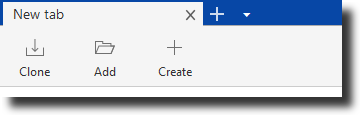
- Launch Sourcetree and click + to open a new tab.
At the top of the tab, click Create.
On the Create a repository screen, click Browse.
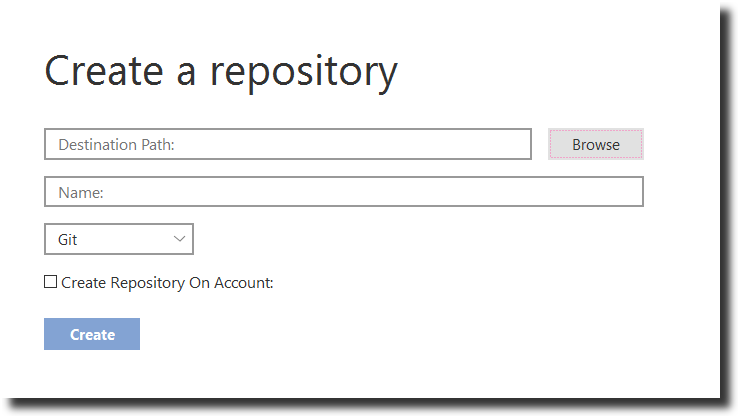
Select the top-level folder of your Unity project and click Select Folder. Your project details will now be displayed on the screen.
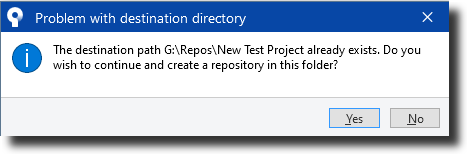
Click Create and wait for Sourcetree to create the repository. If you are notified that the destination path for the project already exists, click Yes to continue.
Under Unstaged Files, select any singular file with the
Library/path.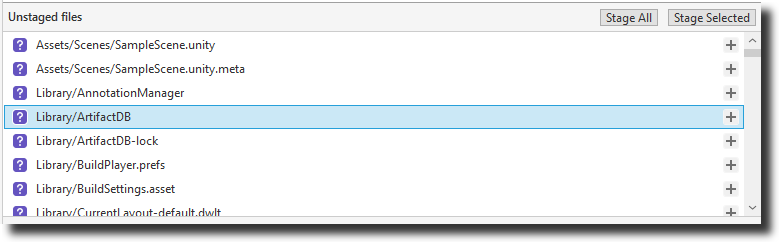
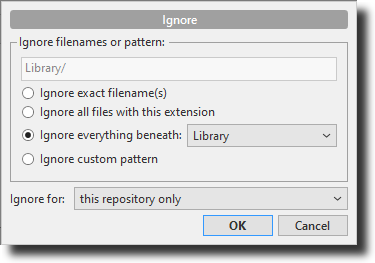
Right-click the file and select Ignore.
In the Ignore dialog box, select Ignore everything beneath: Library. Click OK.
All files with the
Library/path should now disappear from the Unstaged Files section. Select the.gitignorefile and double-click to open it in a text editor such as Notepad.Copy and paste the contents of the .gitignore file for Unity into your local
.gitignorefile. Then Save and Close your file.The Unstaged files section in Sourcetree should now reflect these changes and you’ll notice there are fewer files visible. Click Stage All.
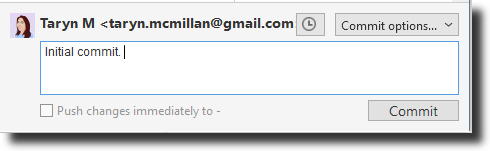
Write a short commit message in the box at the bottom of the window. Click Commit.
Congratulations! You will now see your commit logged in the main branch of your project in Sourcetree.
Creating a remote repository
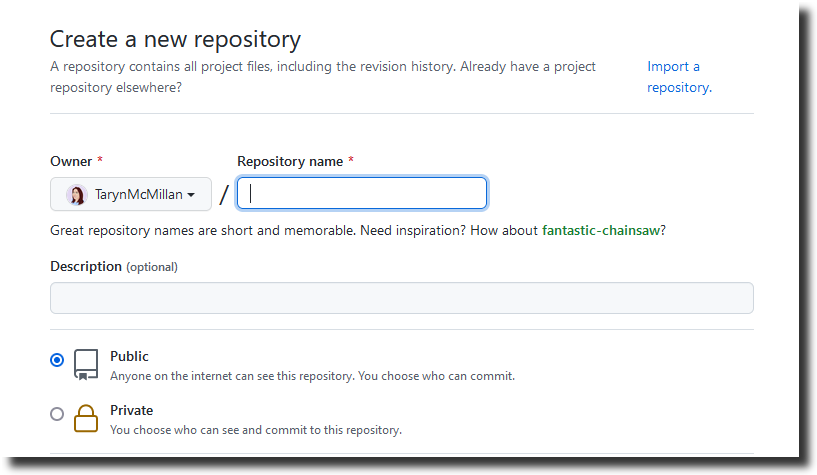
While logged into your GitHub account in a browser, click + in the top-right corner of the screen. Select New Repository.
Enter in your project details and choose whether the repository will be public or private. Click Create Repository.
On the next screen, copy the HTTPS URL.

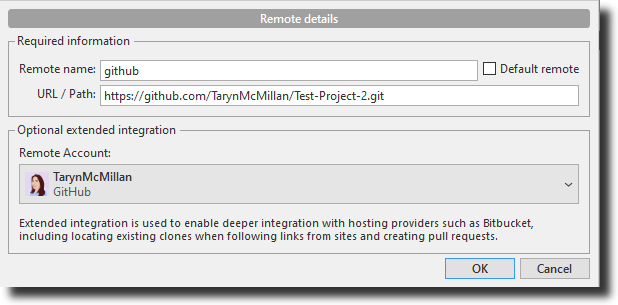
With your project open in Sourcetree, go to Repository > Add Remote.
In the Repository Settings Dialog Box, click Add. Enter in a Remote Name and paste the URL you copied from GitHub into the URL/Path. Using the dropdown, select your GitHub account, then click OK.
Click OK in the Repository Settings dialog box.
Back in the main Sourcetree window, click Push to open up the Push dialog box. Select the branch you want to Push and double-check that the remote repository details are correct.
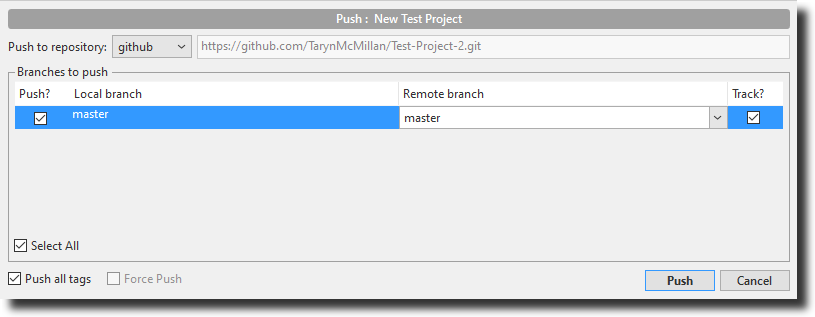
Click Push.
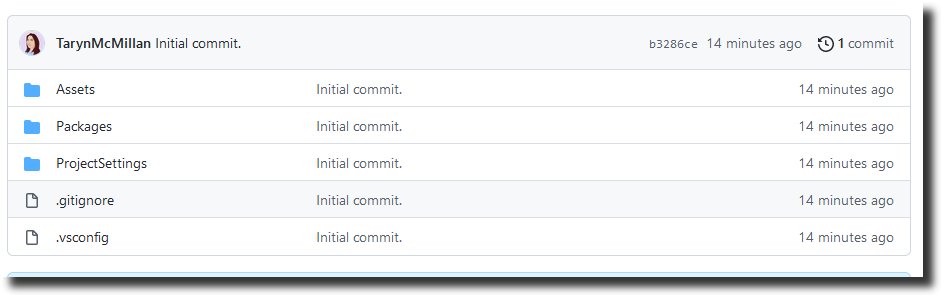
Congratulations! You can now access your repository via your GitHub profile!